How to Set Up a Metamask Wallet in 10 Minutes or Less (With Pictures)
How to Set Up a Metamask Wallet in 10 Minutes or Less (With Pictures)
On October 10, 2023 by adminSee here: How to connect Metamask to Polygon Network
What is Metamask?
Metamask because it’s beginner friendly and easy to use digital wallet.
It’s compatible with most Ethereum apps– like Polygon, Binance Smart Chain and Avalanche…
Has over 30 million users….
And this guide will show you how to install Metamask on your computer in 10 minutes…
So you can start storing, sending and swapping your first digital currency!
How to install Metamask (Step-by-Step)
Step 1:
You can download Metamask on either Google Chrome or Firefox
We’ll use Chrome for this example. Step one is to open Google Chrome and go to Metamask.io.
You should see this page:

Now click the ‘Download Chrome’ button.
Step 2:
The button will redirect you to the chrome web store to add the web browser extension to Chrome.
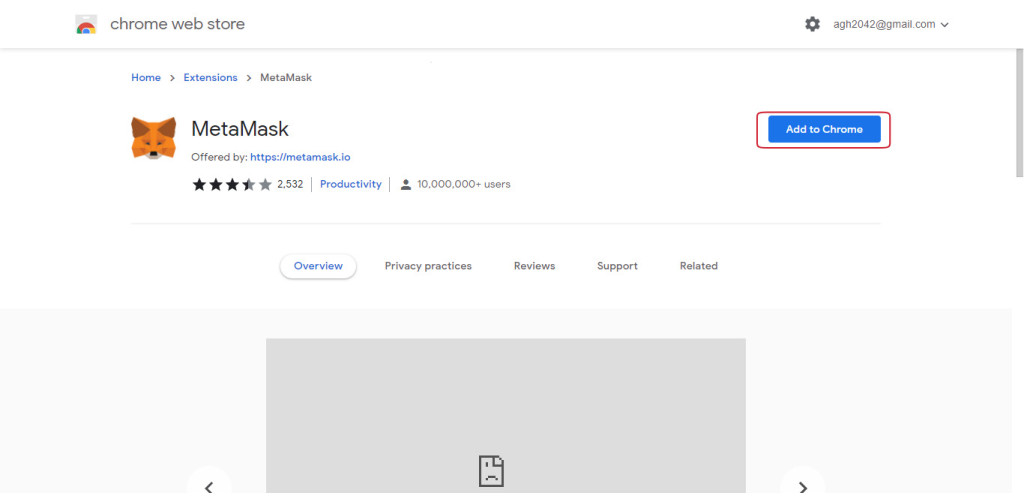
Click ‘Add to Chrome’ to download.
This step adds the Metamask extension on your Chrome toolbar at the top right (the fox icon).

Click the fox, and go to the stop 3.
Step 3:
You should see this screen:

Click “Create a Wallet.”
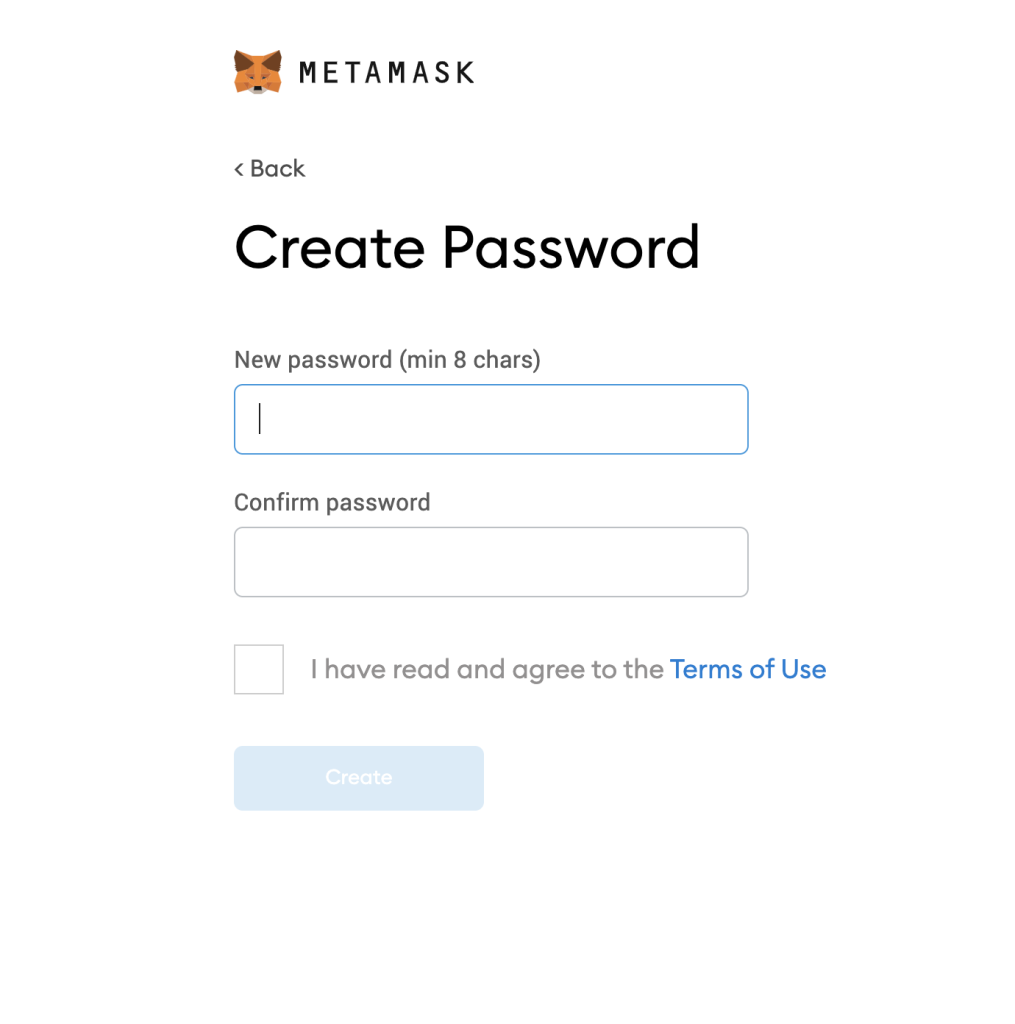
Step 4:
Next, you’ll create your password.
Step 5:
Now you’ll receive your Secret Backup Phrase:
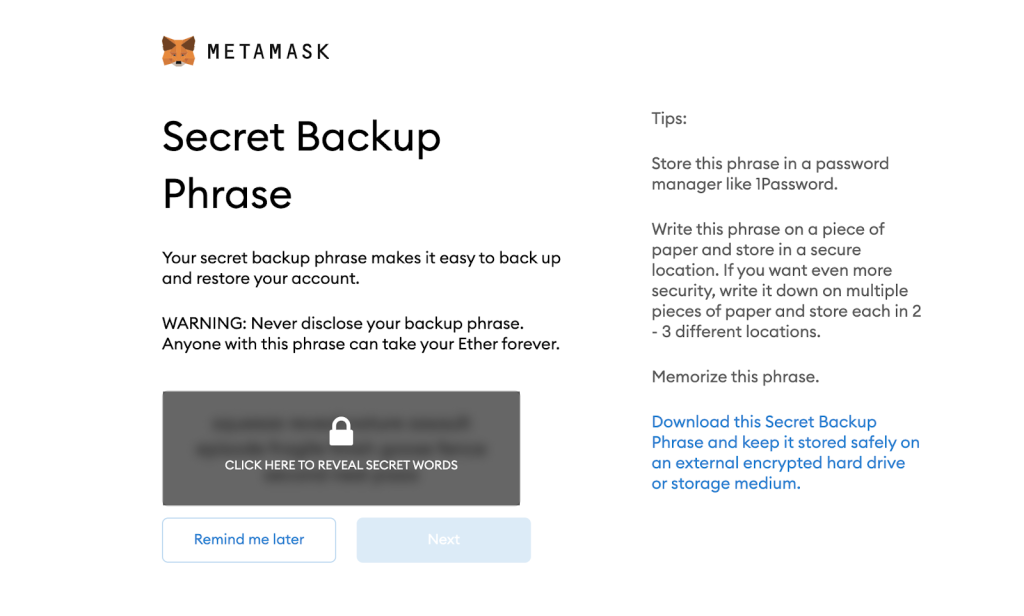
Never ever share your Secret Backup Phrase.
Anyone with this phrase can unlock your wallet, and access your digital assets.
The safest place to store your secret backup phrase is on physical paper, tucked somewhere safe.
I know you may be thinking…

But hackers have used computer malware to steal secret recovery phrases in the past.
That’s why I recommend writing down your phrase on paper before moving onto the final step…
Step 6:
Congratulations! You did it!
Click “All Done” to complete the installation.
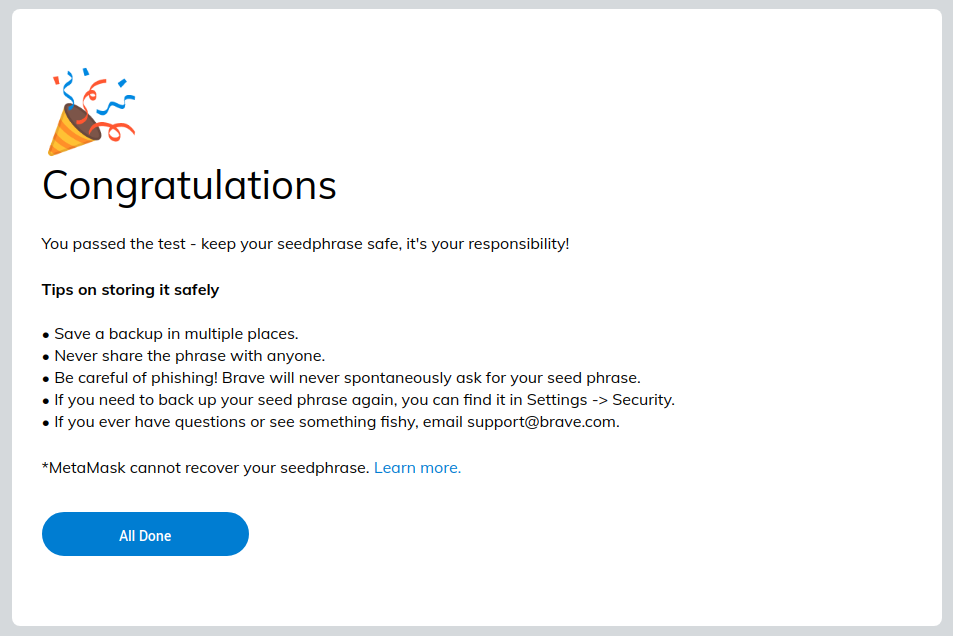
After that, you’ll be able to access the main dashboard of your Metamask wallet.
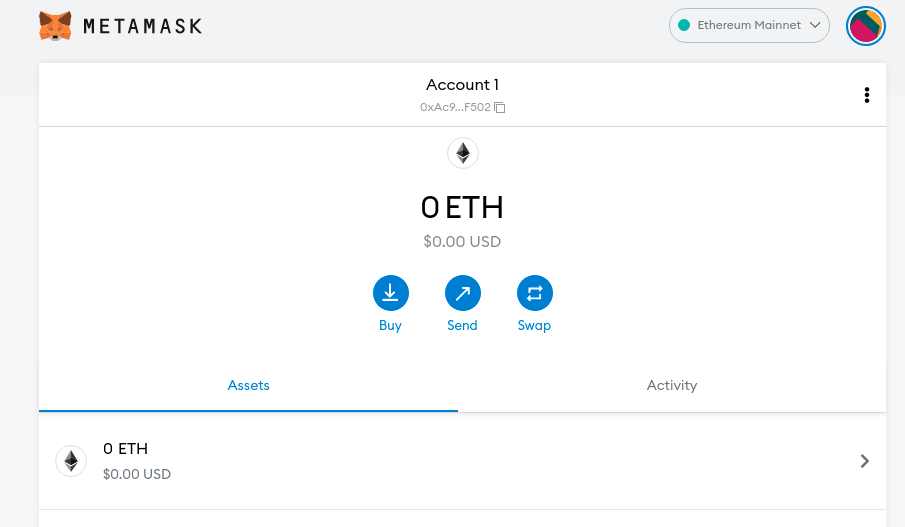
Now that your wallet’s set up, let’s go over how to make transactions…
How To Make Transactions With Metamask
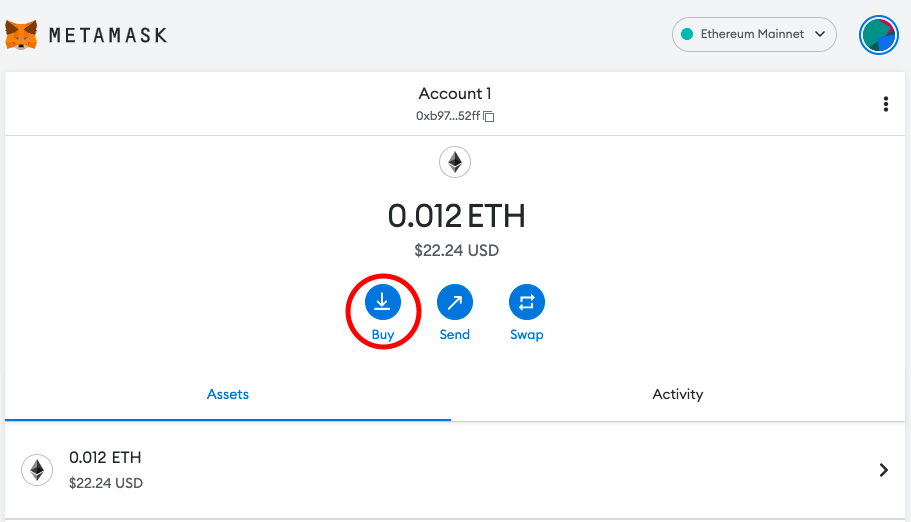
To make transactions on Metamask, you’ll need to have ethereum in your wallet.
This covers the transaction fees to send & swap tokens.
To buy ETH, click ‘Buy’ in Metamask.
Then select an option to pay,
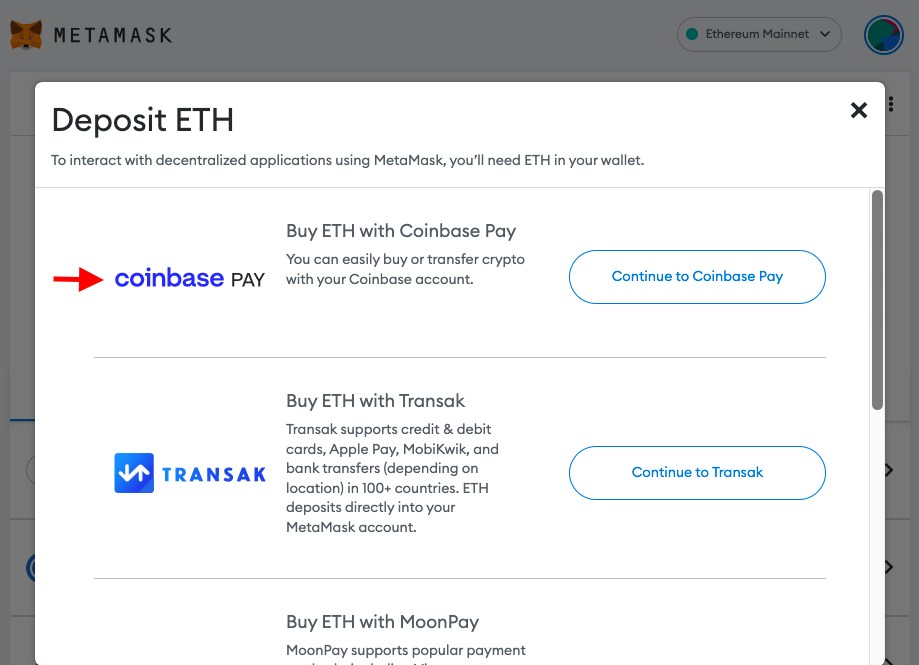
If you’re outside the US, you can use the Transak or Binance.
You’ll be given the steps to pay for ETH…
And once you pay, the balance in your wallet should update.
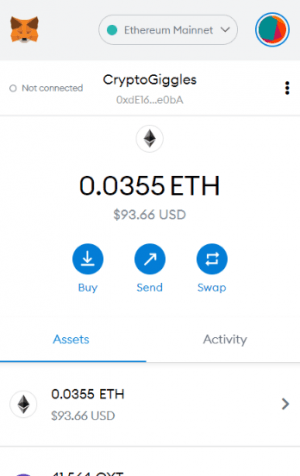
Now you can send & swap digital assets!
How To Connect Metamask To Polygon Network
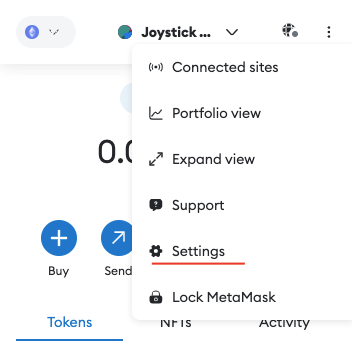
1. Click the 3 stacked dots at the top right corner of Metamask.

2. Select ‘Settings’.
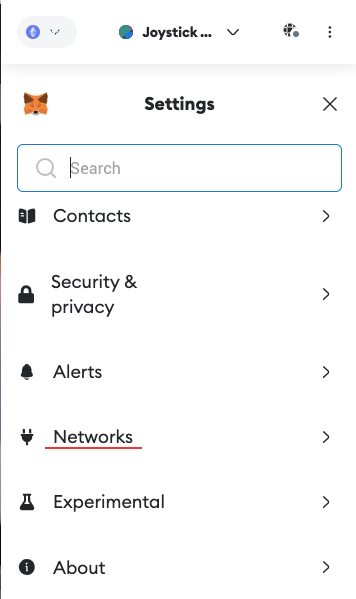
3. Select ‘Networks’.
4. Select ‘Add Network’.
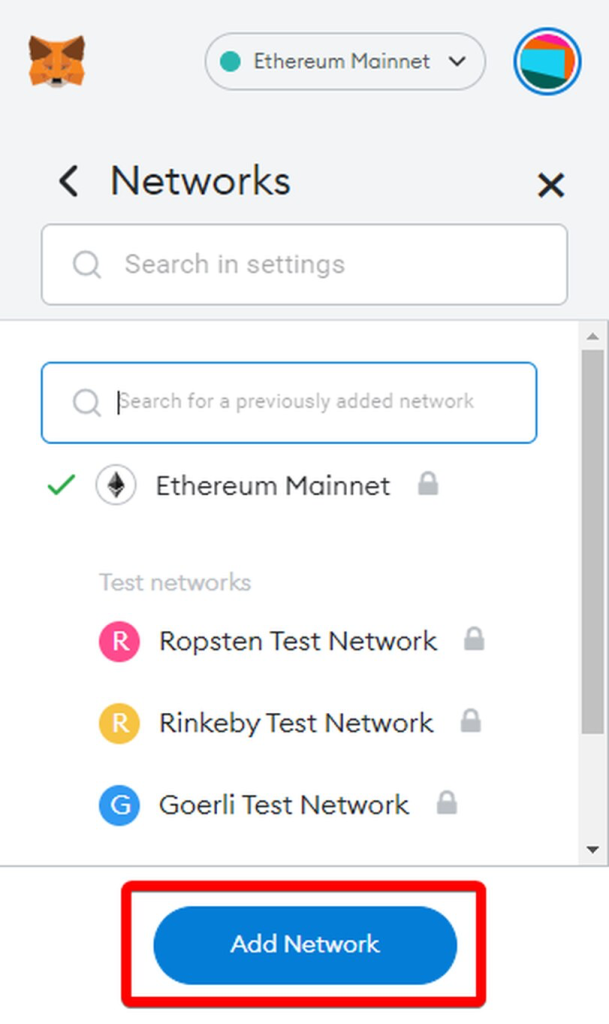
5. Next, you’ll need to provide some network-specific details:
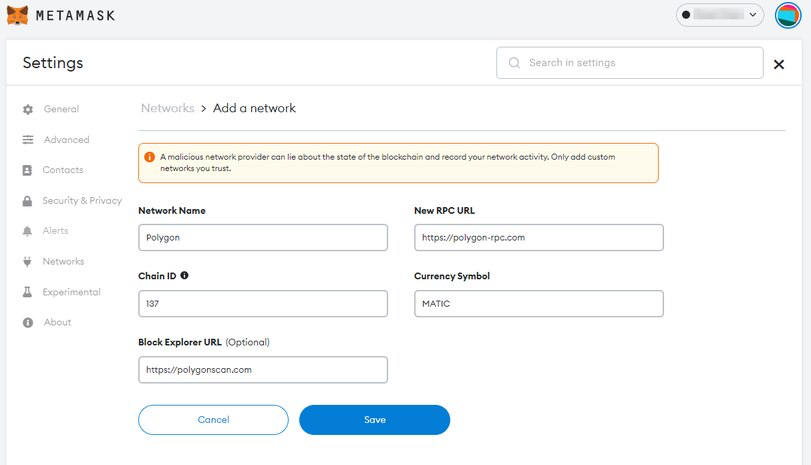
- In the “Network Name” field, enter: Polygon
- In the “New RPC URL” field, enter: https://rpc-mainnet.maticvigil.com/
(Note: This is one of the publicly available RPC endpoints for the Polygon mainnet. Make sure to check for updated RPC URLs if needed.)
- In the “Chain ID” field, enter: 137
- In the “Currency Symbol” field, enter: MATIC
- In the “Block Explorer URL” field, enter: https://polygonscan.com/
Then click “Save” to add the Polygon network to MetaMask.
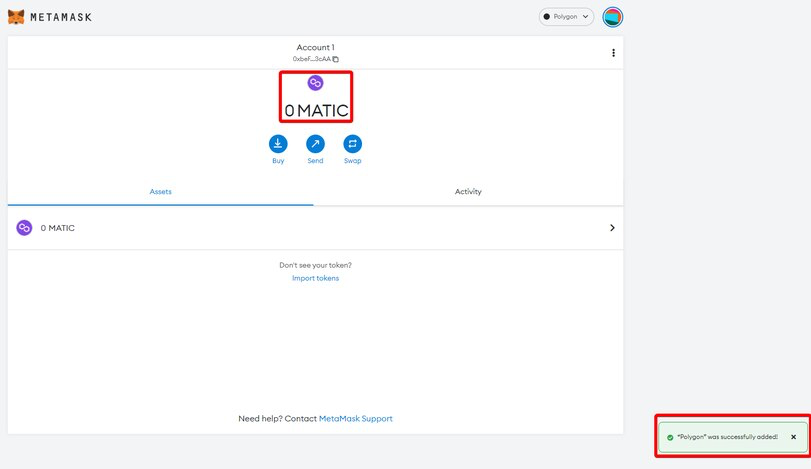
6. Once you click “Save” you’ll see the wallet screen with your available MATIC, and a notification that “Polygon was successfully added.”
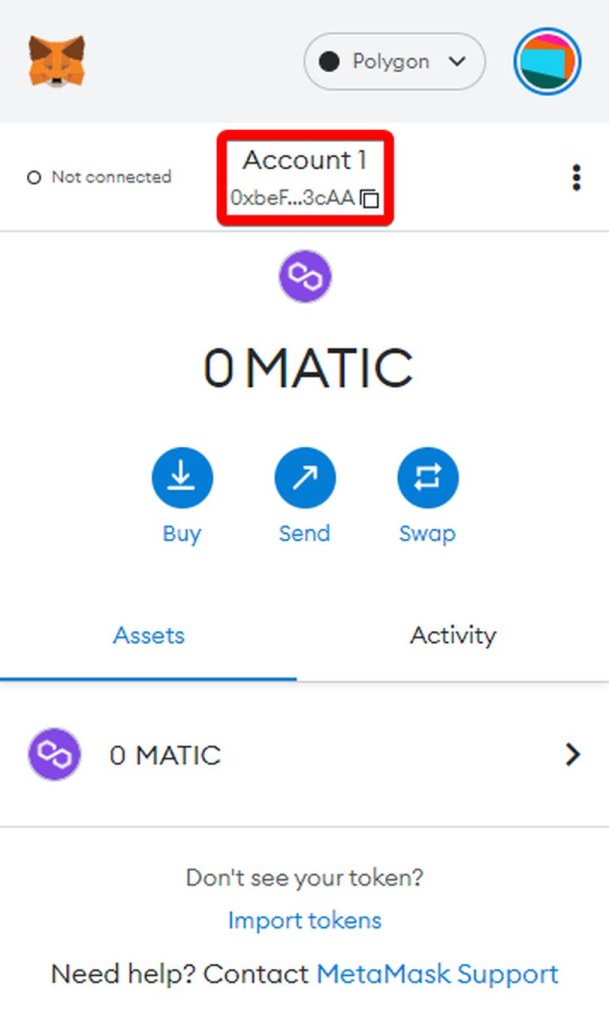
7. You’re done!
This is your wallet address to start receiving MATIC:
Conclusion
Congratulations, now you’ve set up your Metamask wallet and can start making transactions…
Which means you can now Buy, Receive and Send crypto.
Now the next step is to protect your crypto from hackers and scammers…
This article will show you how.